
Connecting MESHLE Devices to Node-RED via Local MQTT
MESHLE devices are wirelessly connected over MESHLE Bluetooth Mesh — a proprietary, offline-first mesh that keeps your lighting, sensors, and actuators running without the cloud. The MESHLE Gateway opens that mesh to your own network over a local MQTT interface: every time a device reports its state — a light changes colour, a sensor detects occupancy, a blind moves — the gateway publishes a JSON message to your local broker.
The interface works both ways. To control any device, you publish a JSON payload to a single command topic, and the gateway translates it into the corresponding mesh frame. No cloud round-trip, no polling — just event-driven telemetry and commands on a broker you run yourself.
This guide walks the full setup end to end: configuring the gateway for local MQTT from the MESHLE app, running a Mosquitto broker, connecting Node-RED, receiving live telemetry, and sending control commands. It's written for developers, building-automation and BMS integrators, and OEM engineers who want MESHLE lighting wired into a local automation flow.
What You Need
Have the following in place before you start.
- MESHLE gateway powered on and connected to the same network as your broker
- A machine to run Mosquitto and Node-RED (Mac, Linux, or Windows with Docker)
- The MESHLE app (iOS, Android, or desktop) to configure the gateway
Supported Device Types
Every telemetry message carries a device_type integer that tells you which fields to expect. Sensors are read-only; every other type also accepts commands.
device_type | Device | Telemetry fields | Controllable |
|---|---|---|---|
| 1 | HSV colour light | power_on, hue_deg (0–360), saturation_pct, brightness_pct | Yes |
| 3 | HCL tunable-white light | power_on, kelvin (2700–6500), brightness_pct | Yes |
| 4 | Dimmable light | power_on, brightness_pct | Yes |
| 6 | Window covering | power_on, position_pct, tilt_deg, state | Yes |
| 32 | OUT32 multi-channel dimmer | power_on, channel_mask, ch0_pct–ch3_pct | Yes |
| 69 | Occupancy and illuminance sensor | occupancy, illuminance_lux | No |
| 83 | Contact and humidity sensor | contact_closed, temperature_c, humidity_pct | No |
Part 1: Gateway Setup via the MESHLE App (one-time)
This is a one-time step. You provision the gateway from the MESHLE app and point it at your local broker instead of the MESHLE cloud broker.
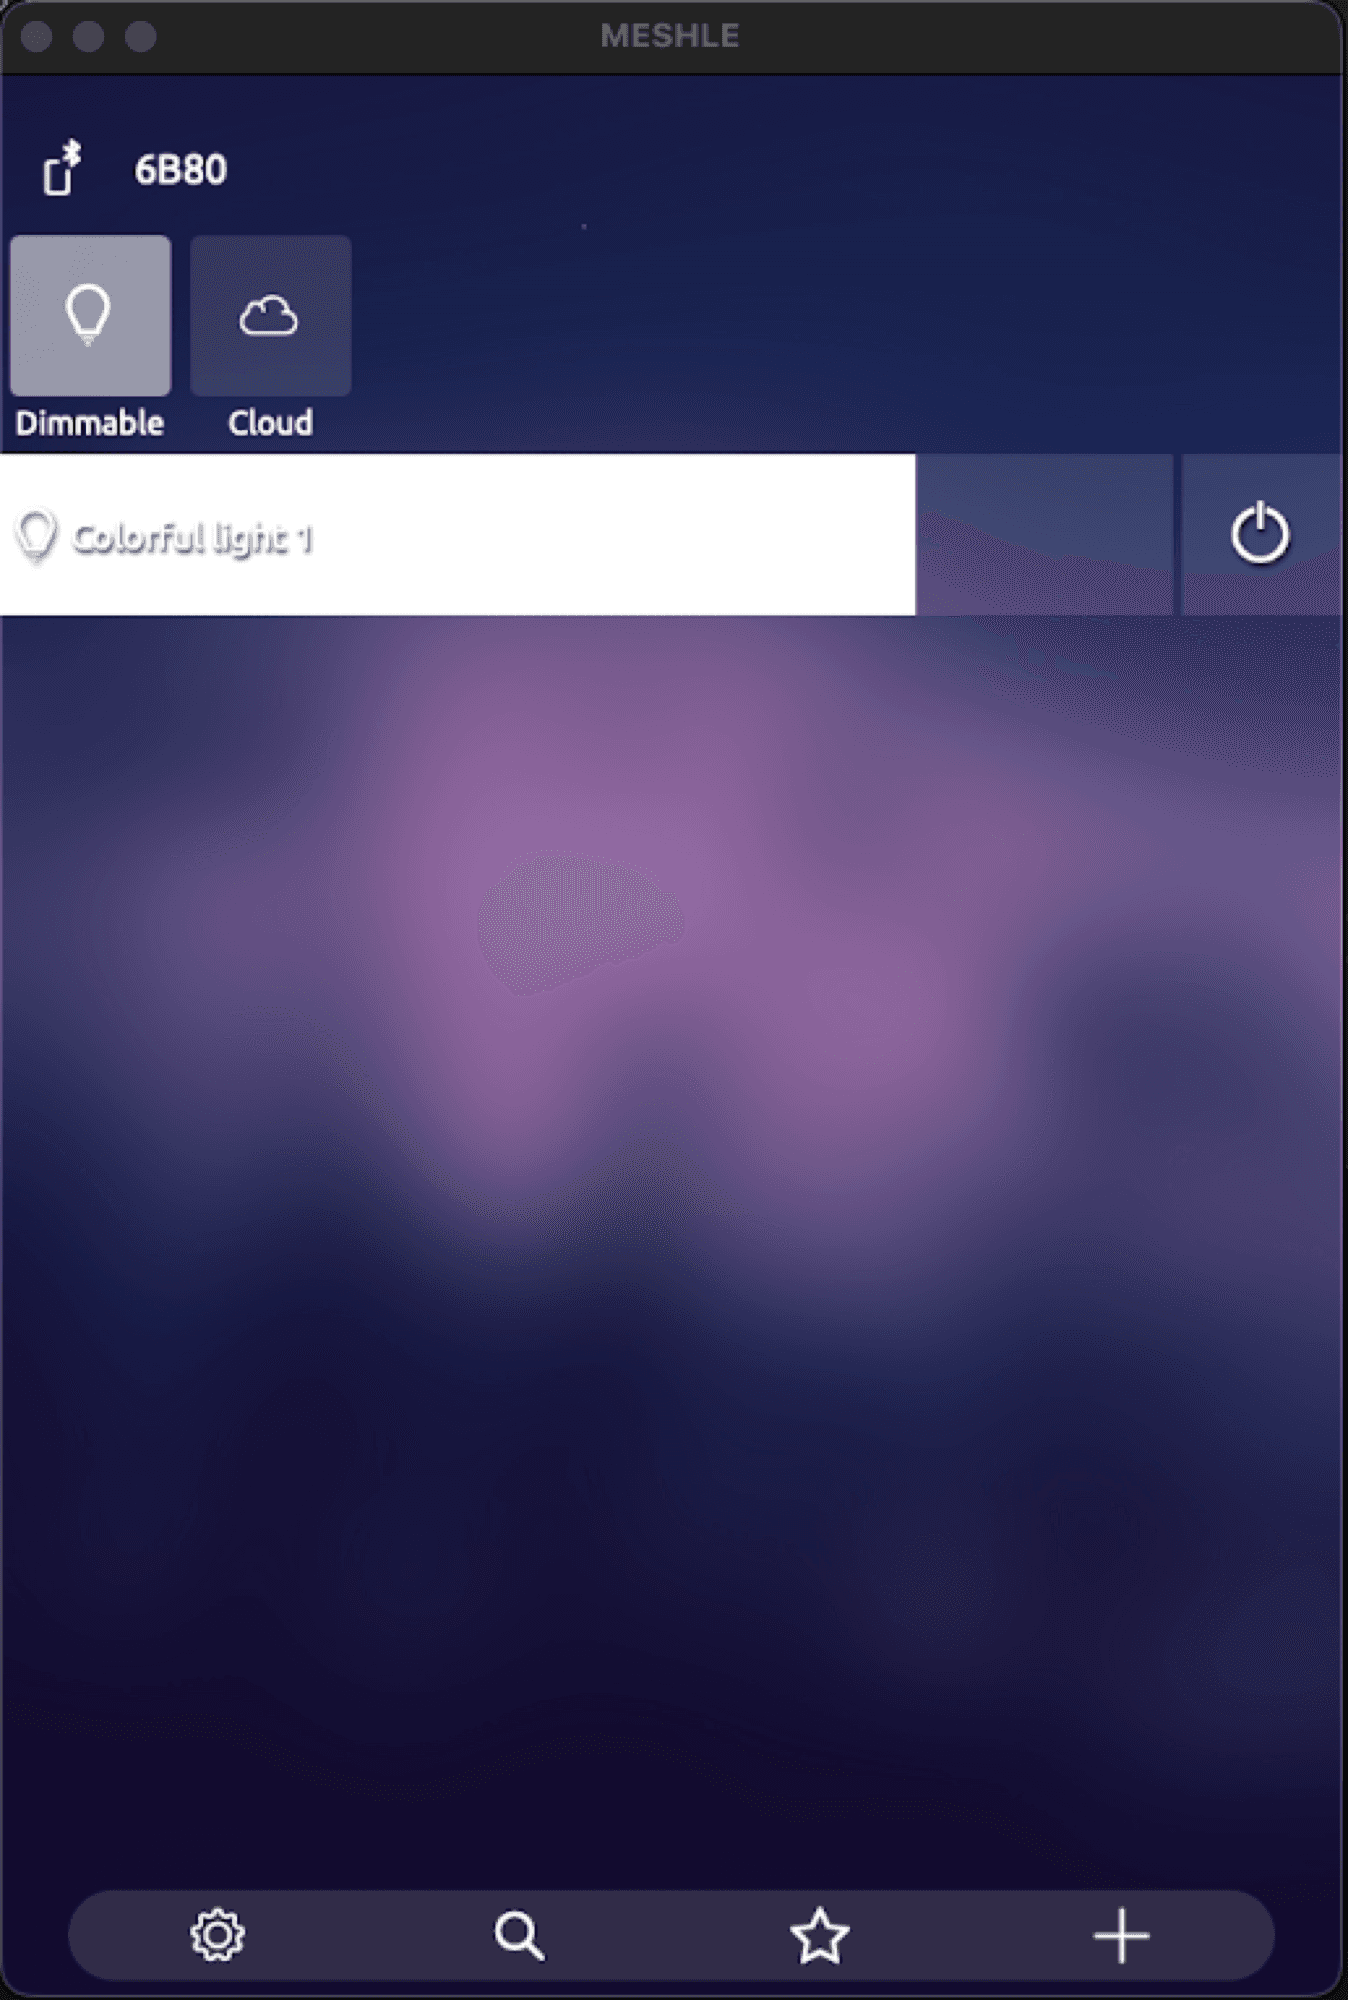
- On the home screen, tap the + button in the bottom-right corner.
- In the Add menu (Timer, Group, Device, Peripheral), tap Device.
- Wait for the BLE scan. When MESHLE Matter Gateway appears, tap it.
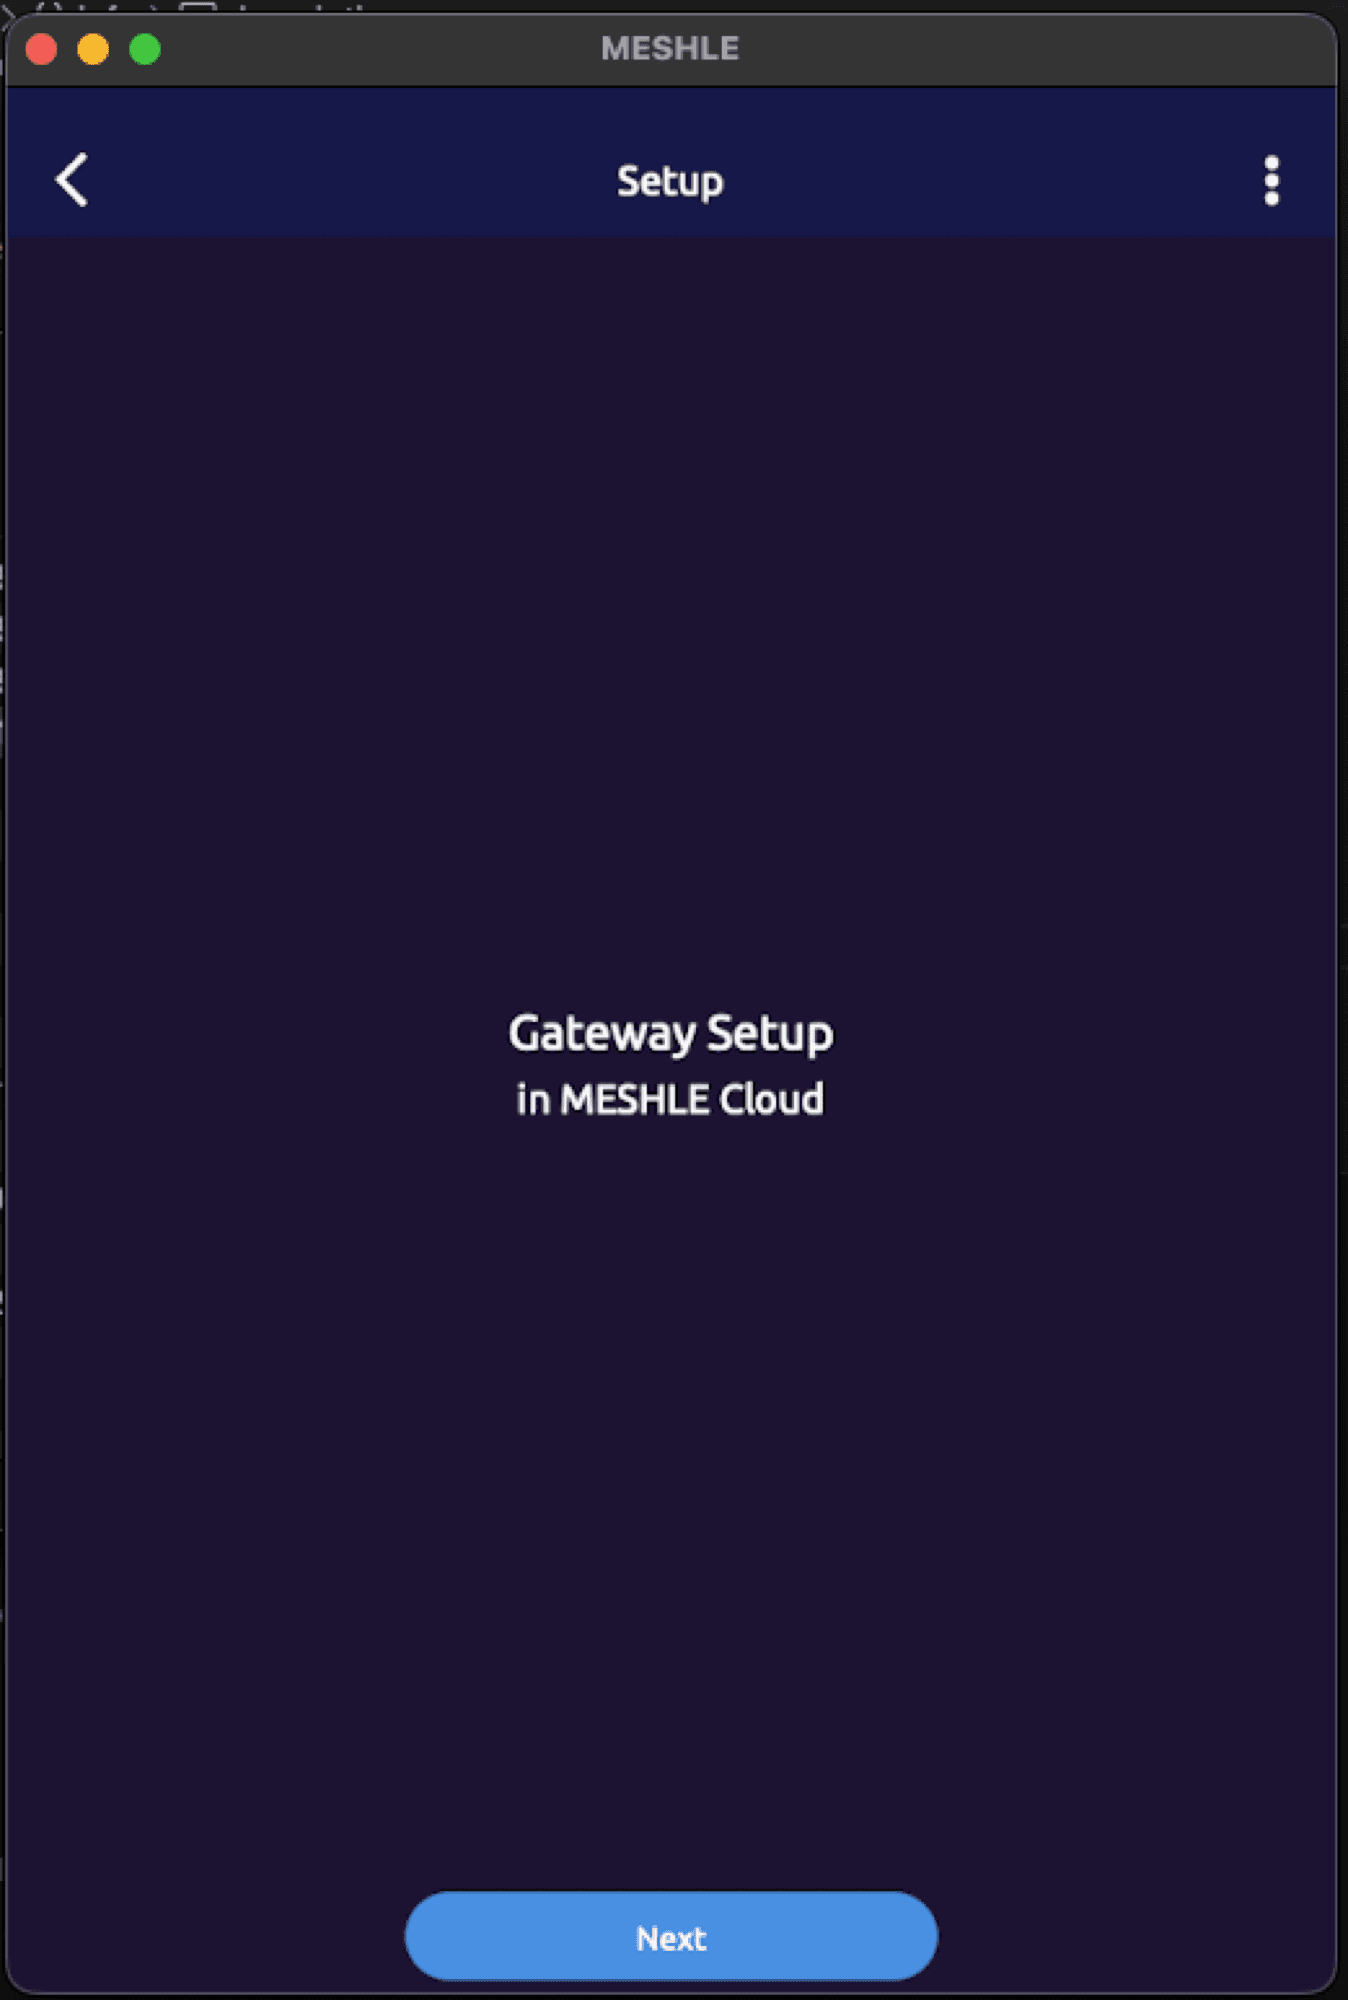
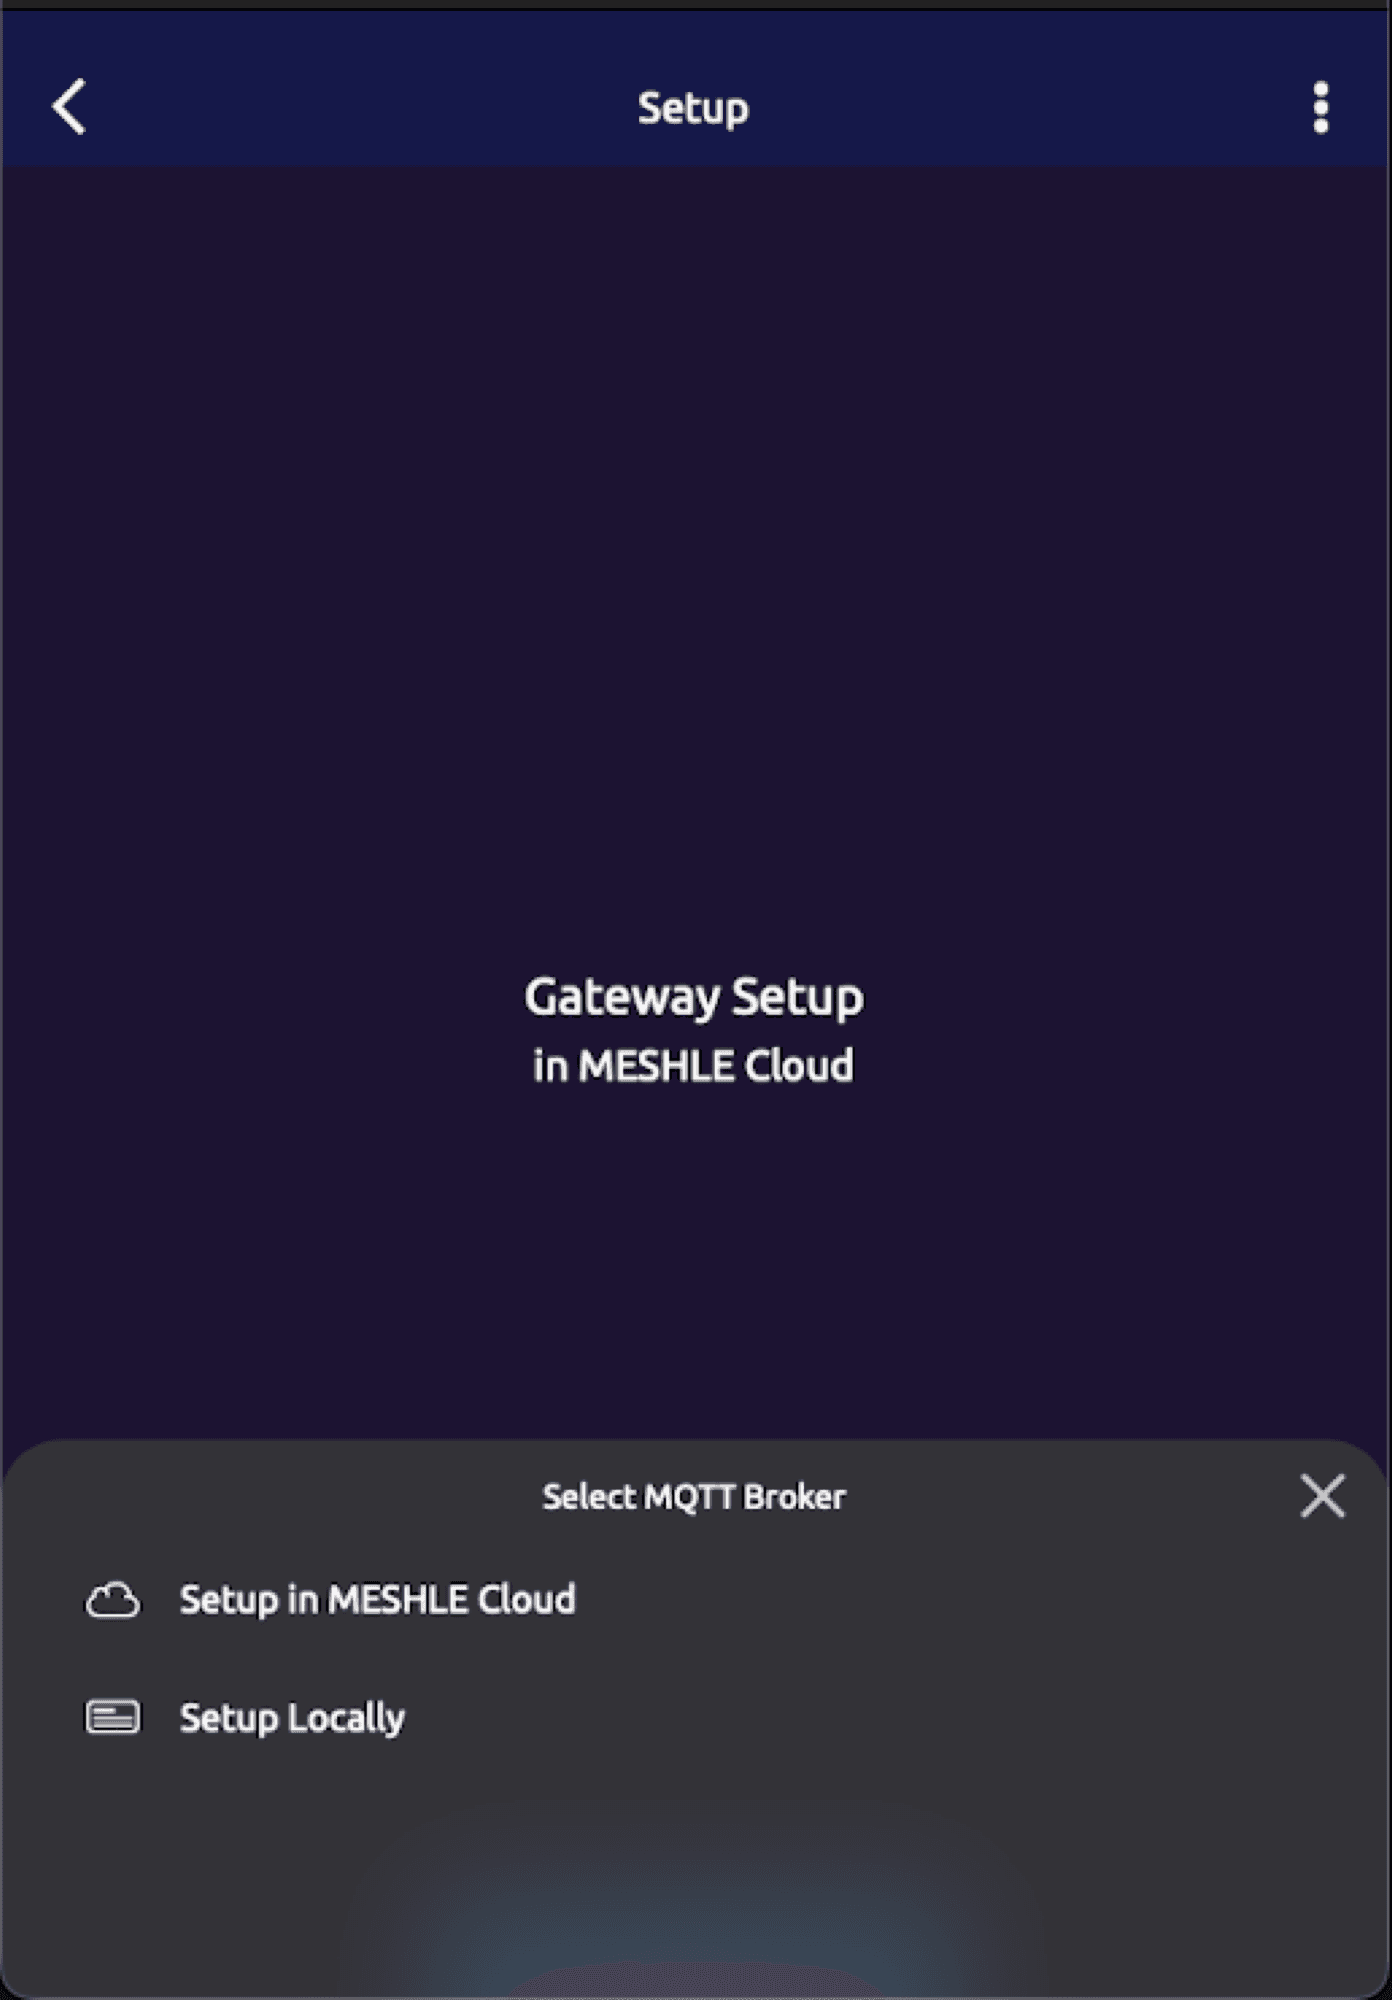
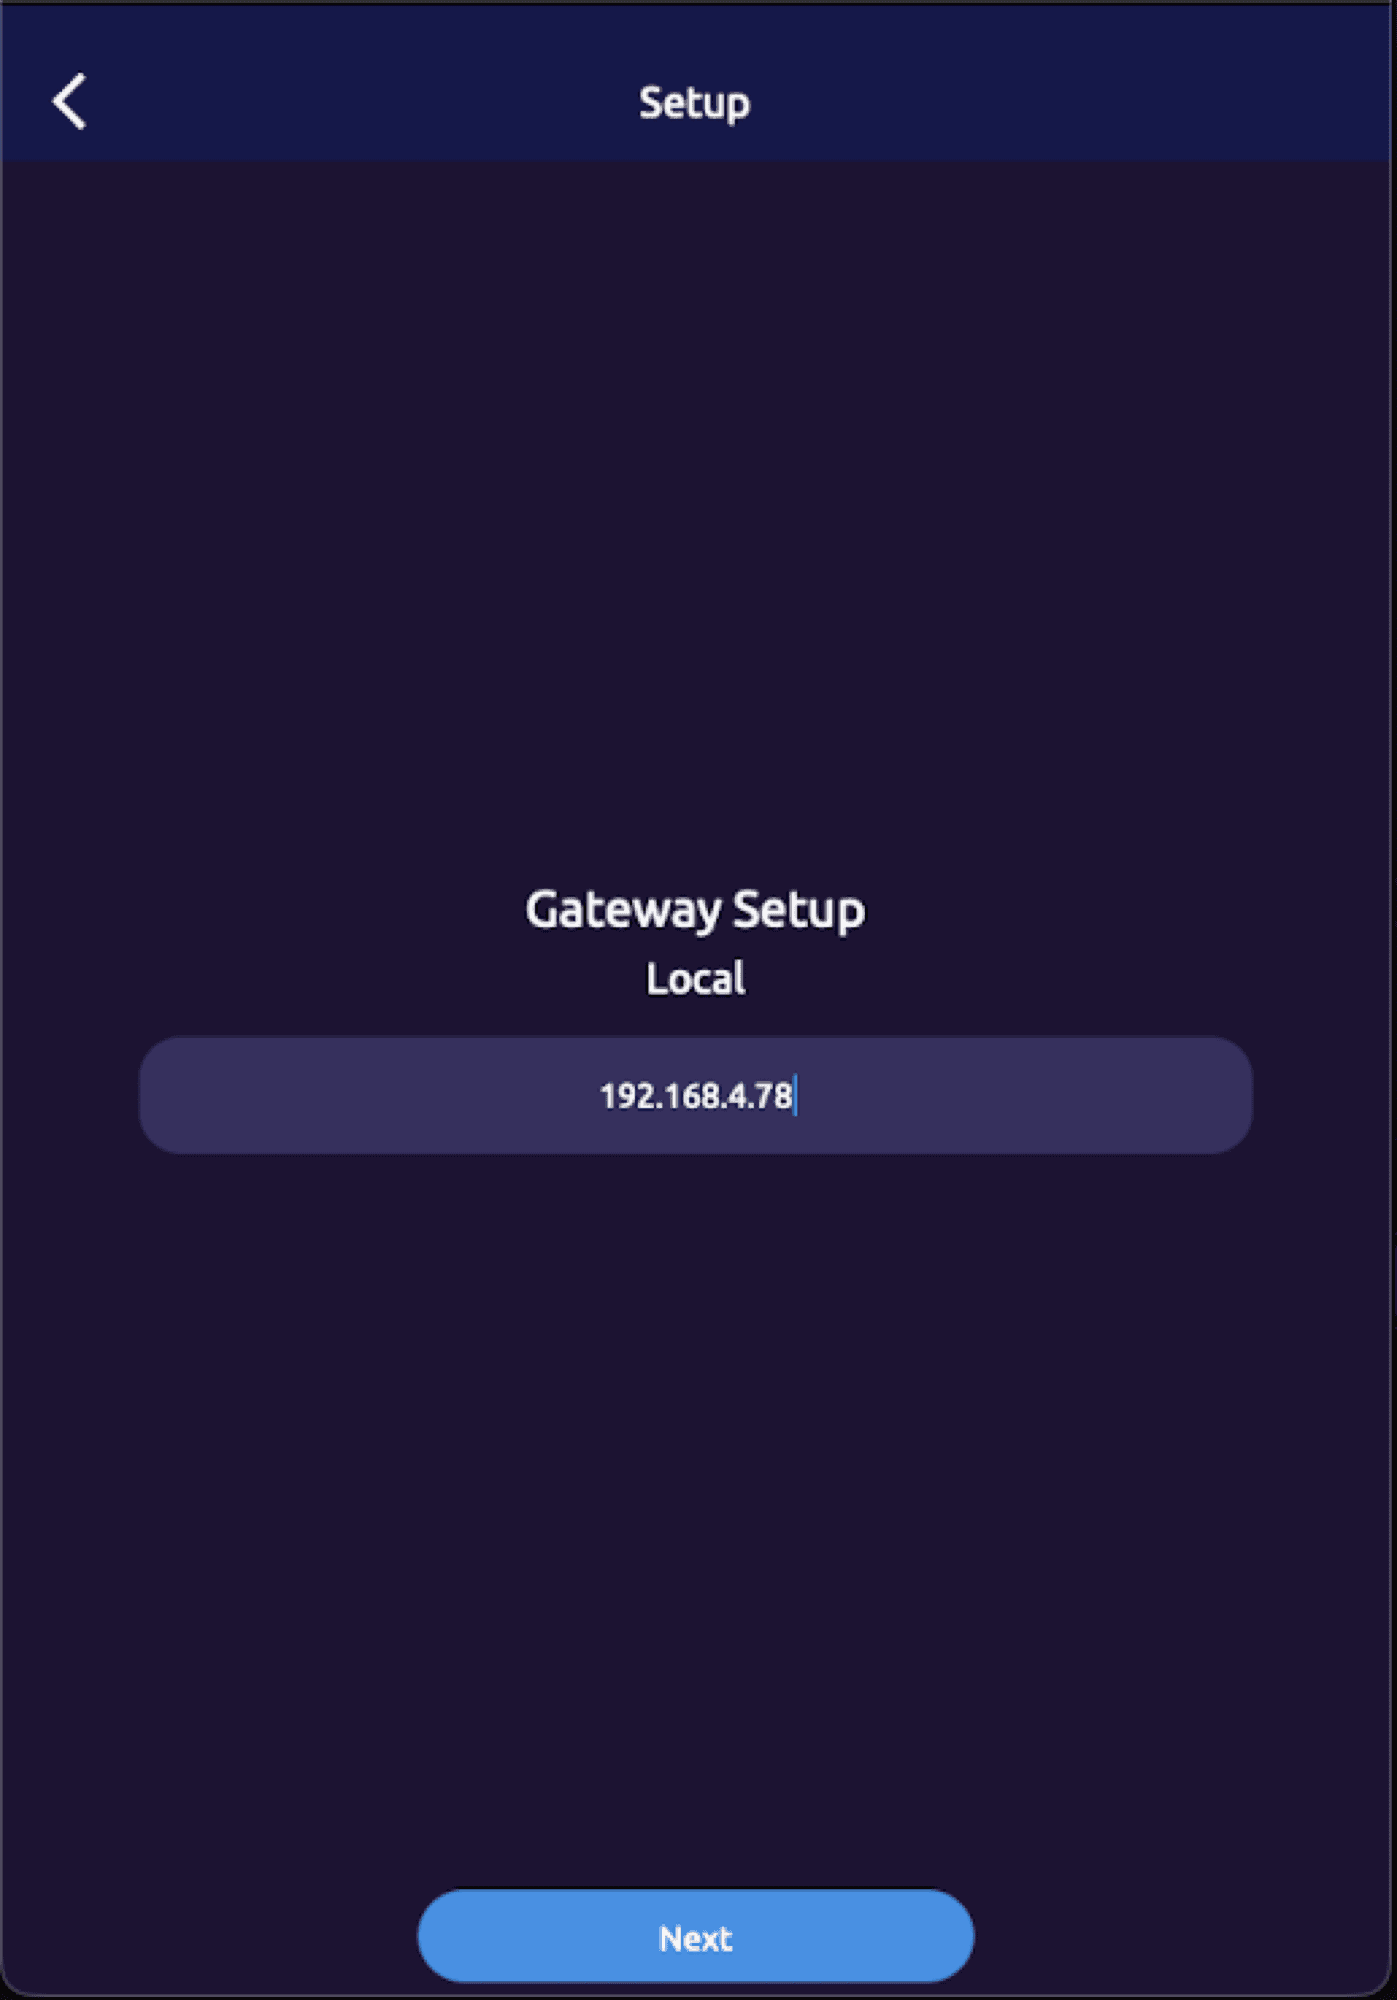
- On the Setup screen ("Gateway Setup in MESHLE Cloud"), tap the three-dot menu in the top-right corner before tapping Next.
- In the Select MQTT Broker sheet, tap Setup Locally, then Next.
- Enter the IP address of the machine running your Mosquitto broker — the same machine where Node-RED runs.
- Choose the network type — LAN (Ethernet) or Wi-Fi. For Wi-Fi, enter the SSID and password; for LAN, no credentials are needed.
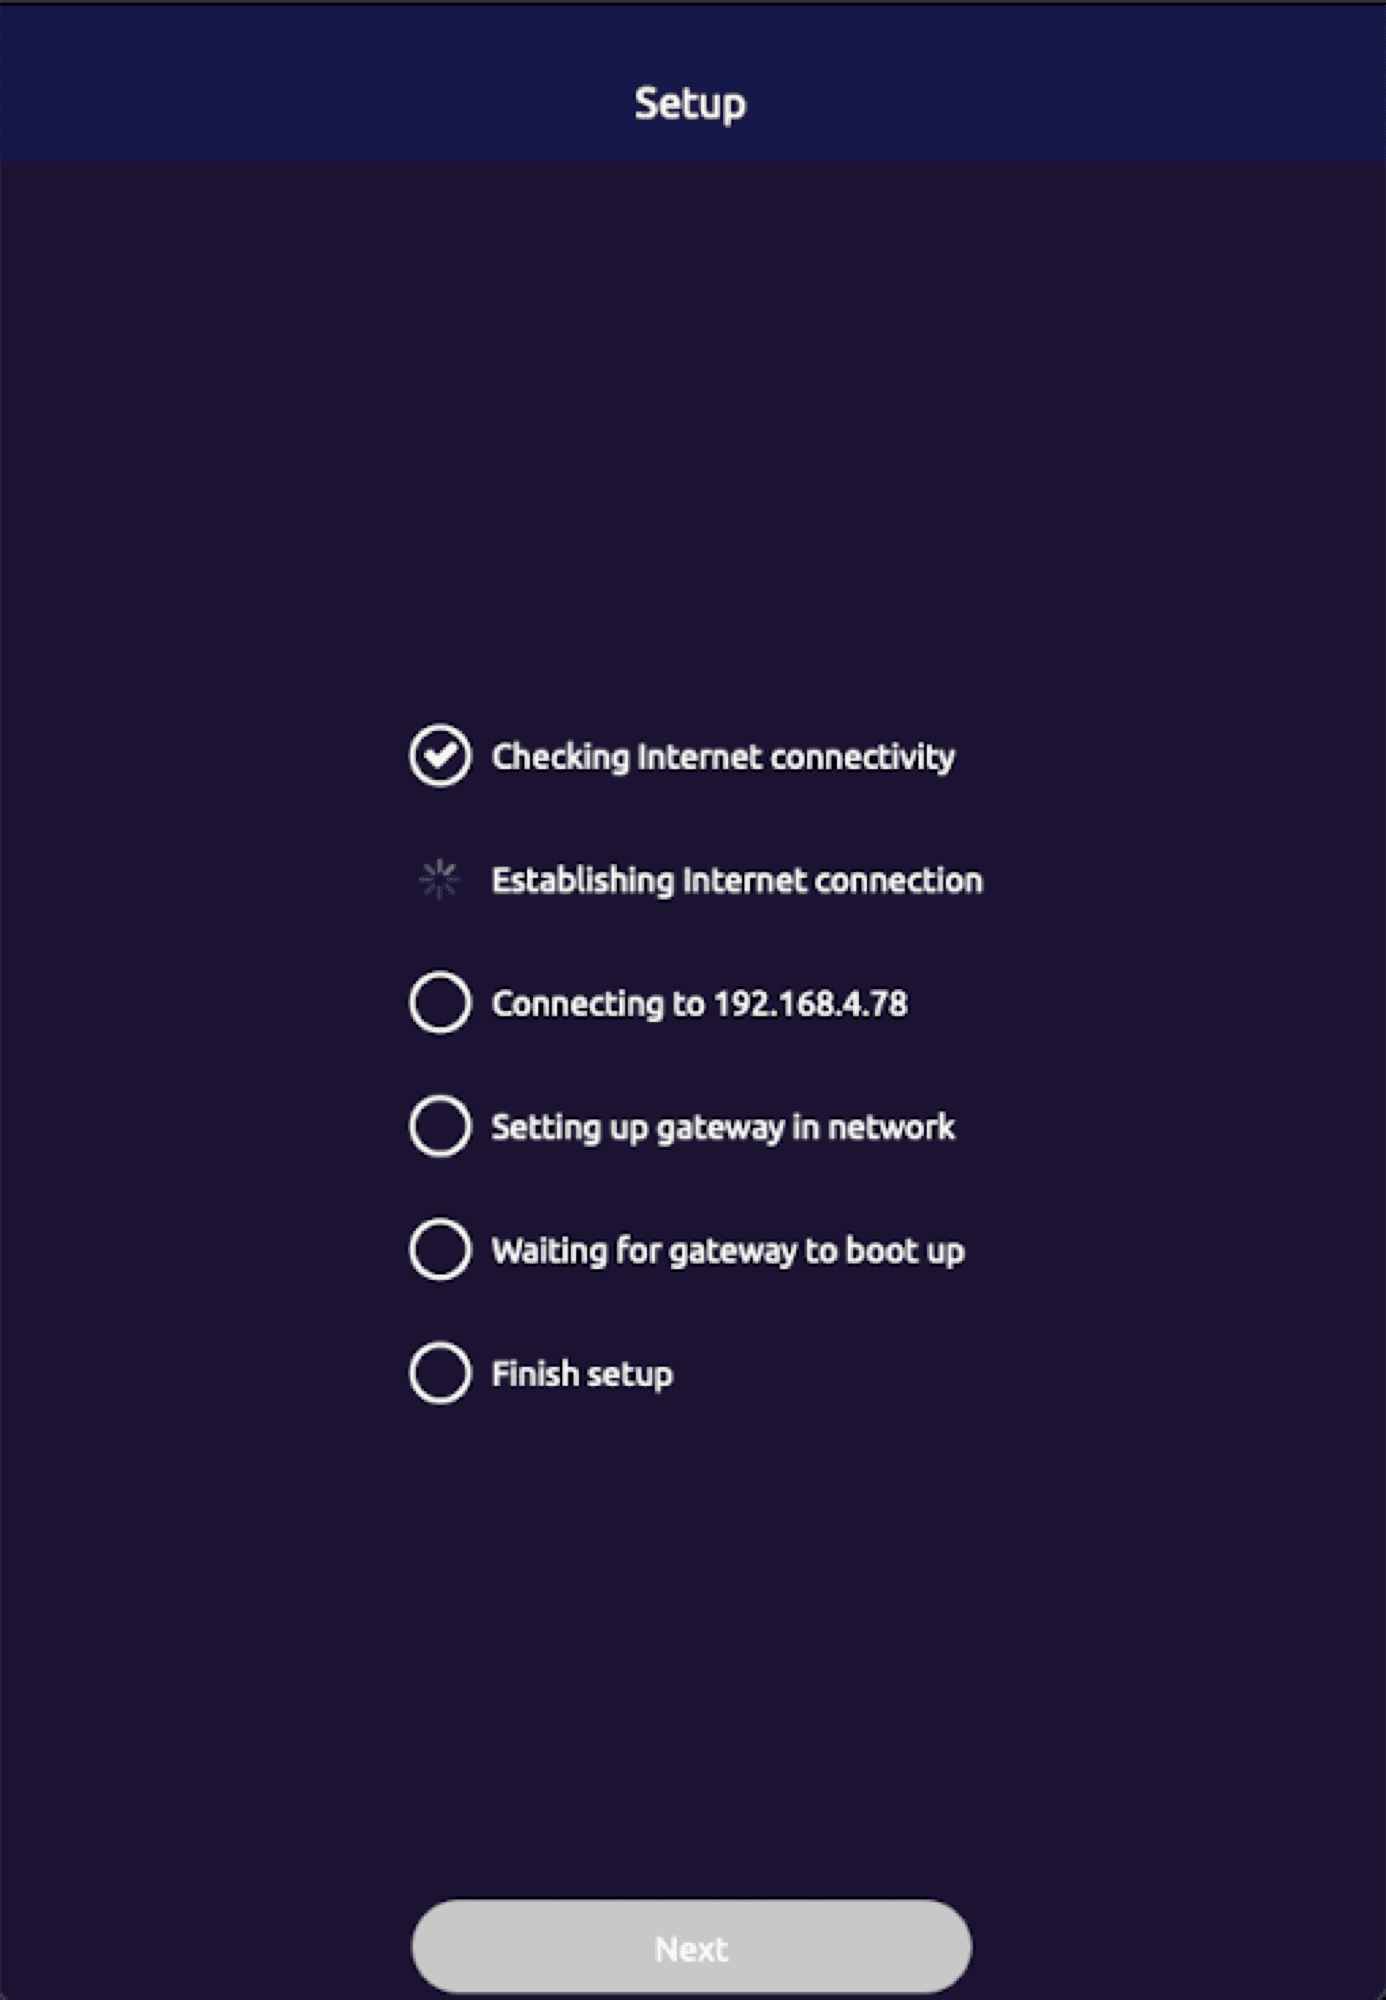
- Wait for the provisioning sequence to finish, then tap Finish.
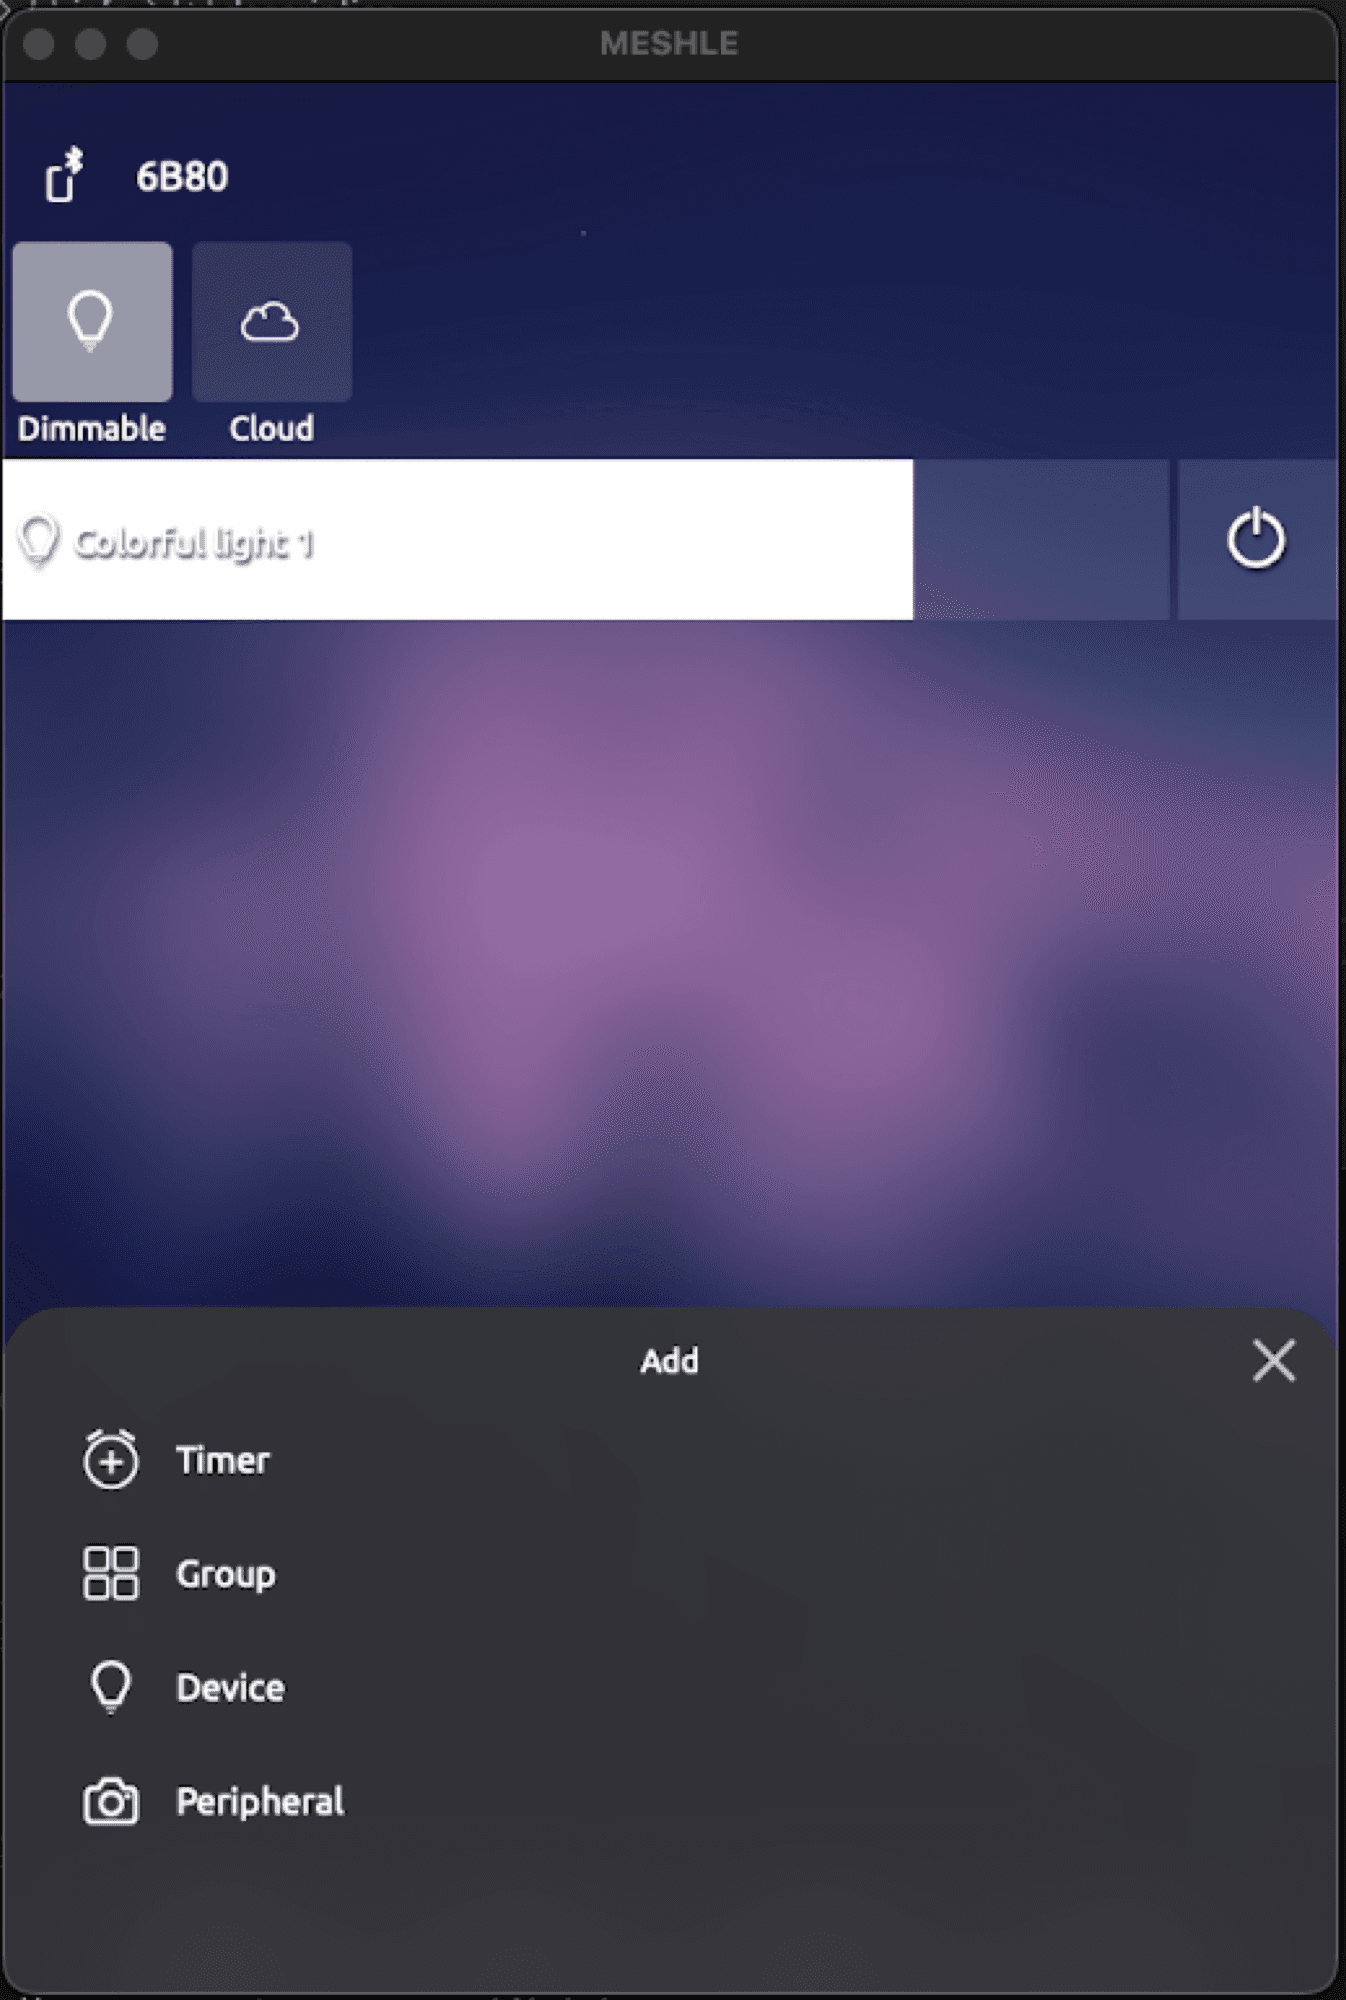


Open the Add menu
On the home screen, tap the + button in the bottom-right corner.
Verify: Run the command below. JSON messages should appear within seconds of any device changing state.
mosquitto_sub -h 127.0.0.1 -p 1883 -t 'v1/gateway/telemetry/json' -vPart 2: MQTT Broker Setup (Mosquitto)
Install Mosquitto on macOS with Homebrew, on Debian/Ubuntu with apt, or via Docker.
macOS:
brew install mosquittoLinux (Debian/Ubuntu):
sudo apt-get install mosquittoDocker:
docker run -d --name mosquitto \
  -p 1883:1883 \
  eclipse-mosquitto:latest \
  mosquitto -c /mosquitto/config/mosquitto.conf
By default Mosquitto binds to 127.0.0.1 only, so neither the gateway nor Node-RED-in-Docker can reach it. Make it listen on all interfaces:
# mosquitto-local.conf
listener 1883 0.0.0.0
allow_anonymous true
Start Mosquitto with the config:
mosquitto -c /path/to/mosquitto-local.conf -vNote:allow_anonymous trueis fine for a closed local network. For untrusted clients, use apassword_fileinstead.
Verify the broker with two terminals — hello should appear in the first terminal:
# Terminal 1 -- subscribe
mosquitto_sub -h 127.0.0.1 -p 1883 -t 'test' -v

# Terminal 2 -- publish
mosquitto_pub -h 127.0.0.1 -p 1883 -t 'test' -m 'hello'
Part 3: Node-RED Setup
Run Node-RED in Docker on port 1880 and open http://127.0.0.1:1880.
docker run -it --name nodered \
  -p 1880:1880 \
  -v node_red_data:/data \
  --restart unless-stopped \
  nodered/node-red:latest
In the MQTT broker config node, set the broker hostname to host.docker.internal — Docker resolves that name to the host machine, so 127.0.0.1 would point back into the container. When you run Node-RED natively (not in Docker), use 127.0.0.1. Then install the @flowfuse/node-red-dashboard palette via Manage palette.
Note: Open the dashboard at http://127.0.0.1:1880/dashboard. Toggle a device from the MESHLE app and the gauges update within a second.Part 4: Receiving Telemetry
Subscribe to v1/gateway/telemetry/json. Messages are event-driven — there is no polling. Add an mqtt in node and set its output to a parsed JSON object.
Each payload is a flat JSON object: device_type and device_id are always present, while the remaining fields depend on the type.
{
  "device_type": 1,
  "device_id": 1,
  "power_on": true,
  "error_flag": false,
  "hue_deg": 180,
  "saturation_pct": 100,
  "brightness_pct": 55
}
Payload examples by device type
HSV colour light (device_type: 1):
{
  "device_type": 1, "device_id": 1,
  "power_on": true, "error_flag": false,
  "hue_deg": 180, "saturation_pct": 100, "brightness_pct": 55
}
HCL tunable-white light (device_type: 3):
{
  "device_type": 3, "device_id": 2,
  "power_on": true, "error_flag": false,
  "kelvin": 3500, "brightness_pct": 70
}
Dimmable light (device_type: 4):
{
  "device_type": 4, "device_id": 3,
  "power_on": true, "error_flag": false,
  "brightness_pct": 40
}
Window covering (device_type: 6): state 0 = stopped, 1 = moving down/closing, 2 = moving up/opening.
{
  "device_type": 6, "device_id": 5,
  "power_on": false, "error_flag": false,
  "position_pct": 60, "tilt_deg": 30, "state": 0
}
OUT32 multi-channel dimmer (device_type: 32): channel_mask is a bitmask — a value of 3 (binary 0011) means channels 0 and 1 are active.
{
  "device_type": 32, "device_id": 4,
  "power_on": true, "error_flag": false,
  "channel_mask": 3, "ch0_pct": 80, "ch1_pct": 60, "ch2_pct": 0, "ch3_pct": 0
}
Occupancy and illuminance sensor (device_type: 69):
{
  "device_type": 69, "device_id": 6,
  "power_on": false, "error_flag": false,
  "occupancy": true, "illuminance_lux": 340
}
Contact and humidity sensor (device_type: 83):
{
  "device_type": 83, "device_id": 7,
  "power_on": false, "error_flag": false,
  "contact_closed": true, "temperature_c": 22.5, "humidity_pct": 48.5
}
Parsing the payload in a function node
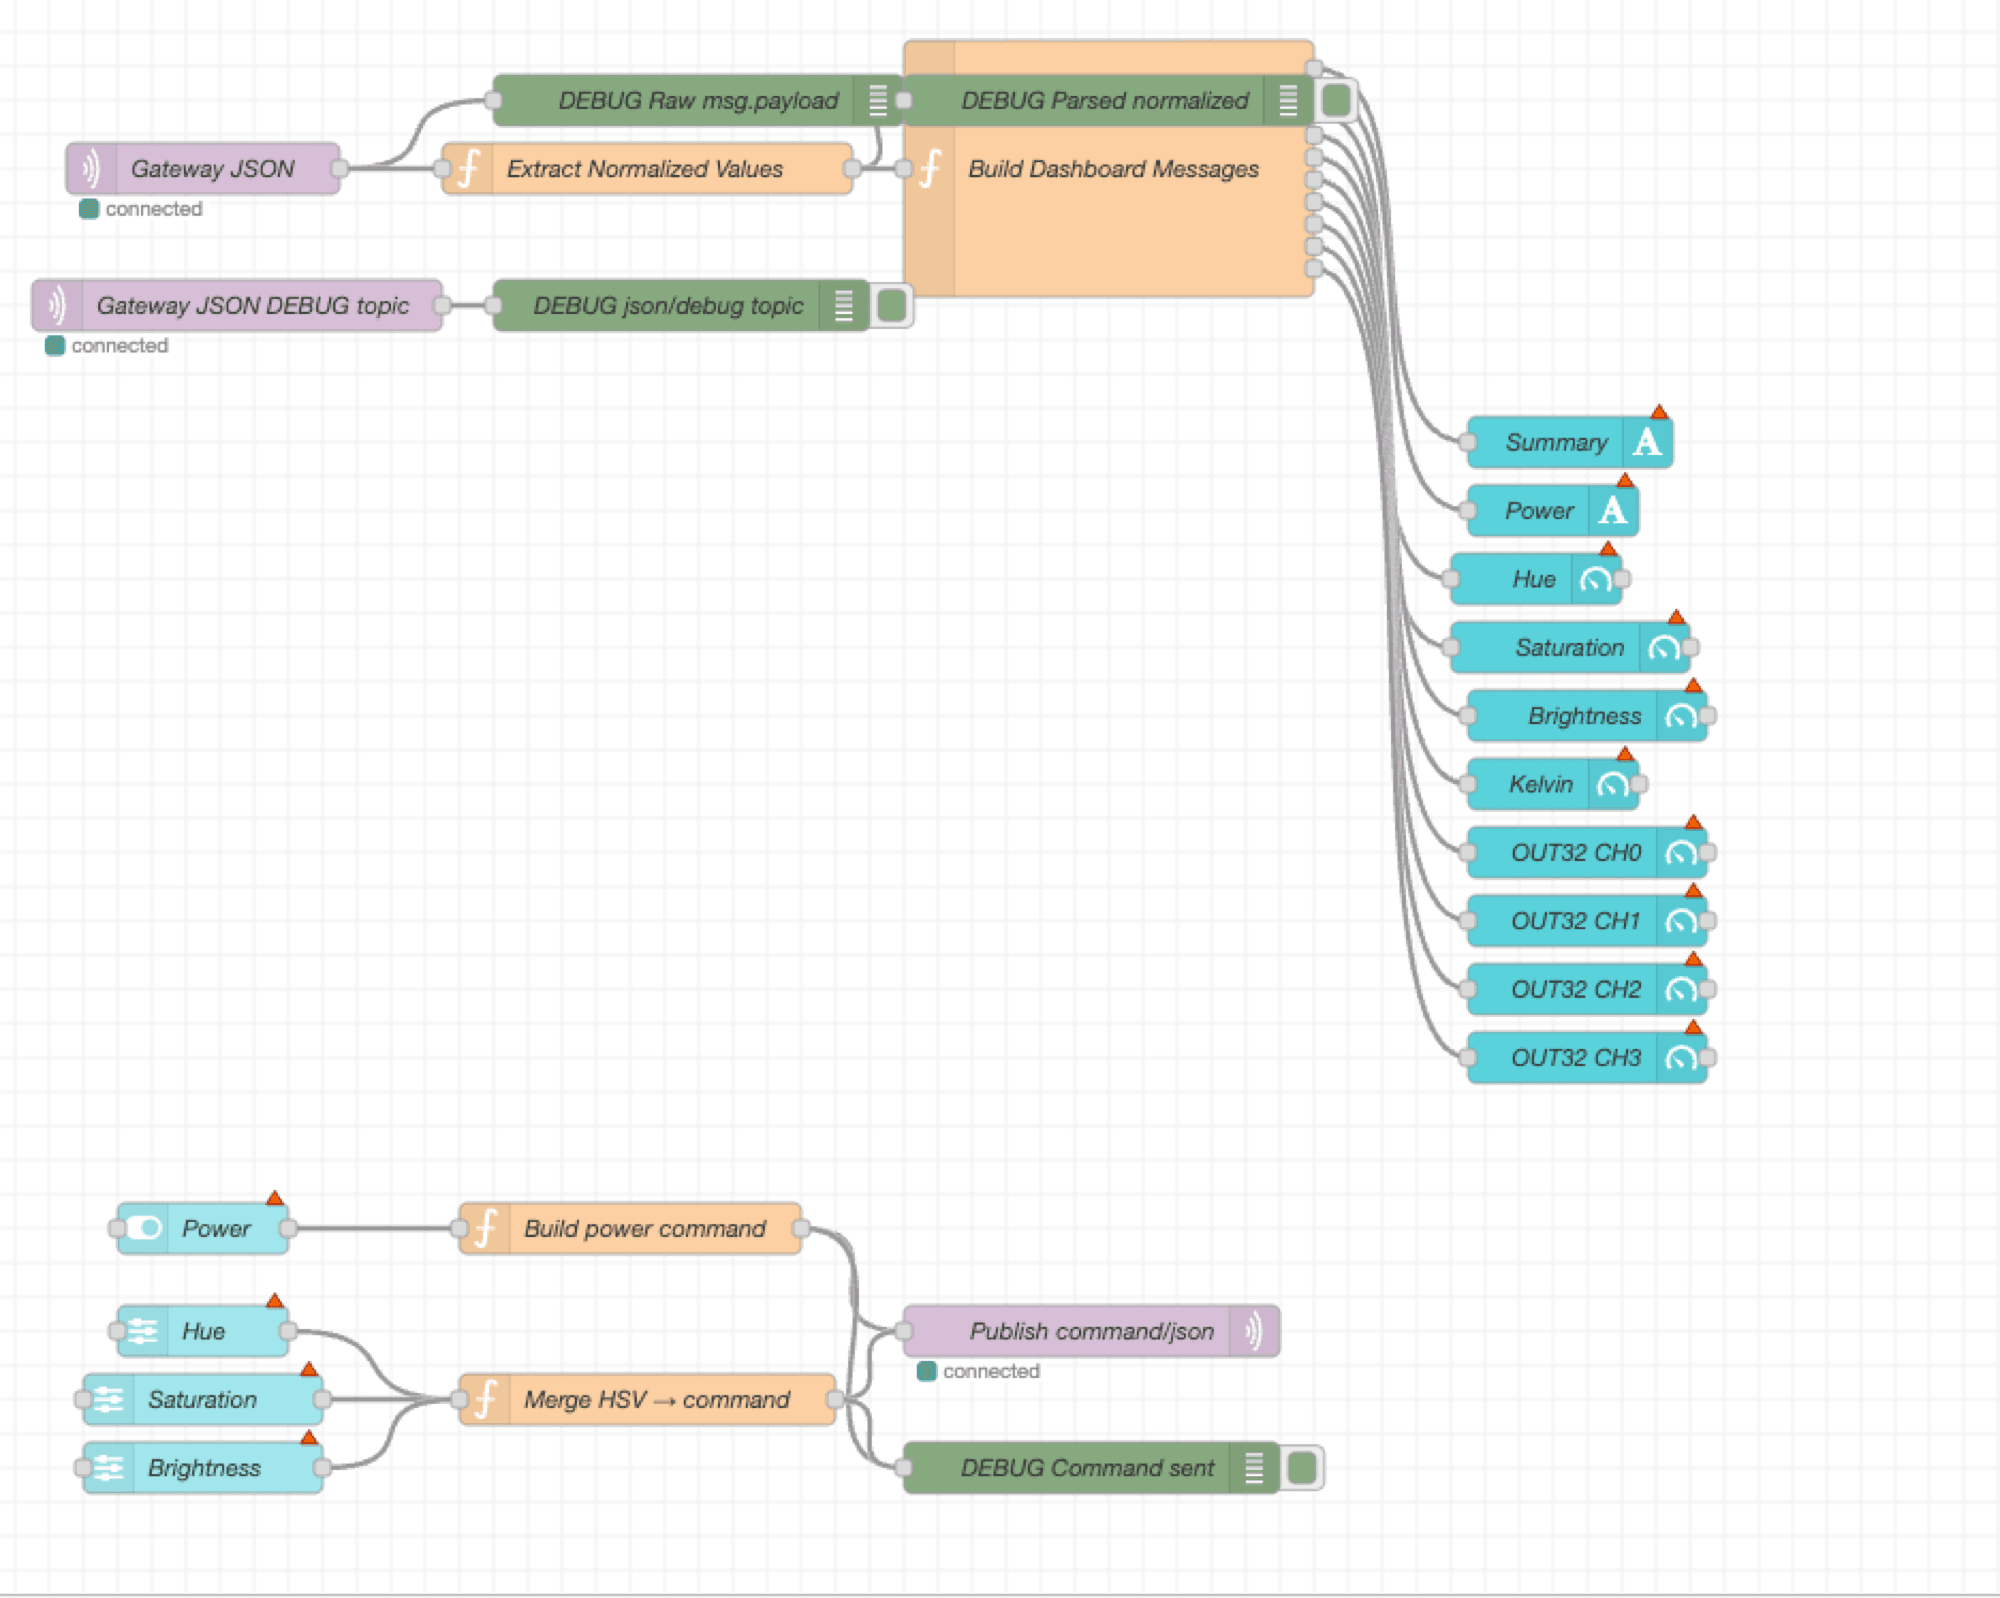
Add a function node after the mqtt in node. This pattern handles all device types safely: a safe number helper, a filter by device, booleans converted to ON/OFF strings, and values routed to separate outputs.
var p = msg.payload || {};

// Safe number helper -- returns fallback when field is absent or null
function num(v, fallback) {
    return (v == null || isNaN(v)) ? fallback : Number(v);
}

// Filter to a specific device if needed
if (p.device_type !== 1 || p.device_id !== 1) return null;

// Power -- convert boolean to string for dashboard display
var powerOn = p.power_on === true ? 'ON' : (p.power_on === false ? 'OFF' : '-');

// HSV fields
var hue        = num(p.hue_deg,        0);   // 0-360 degrees
var saturation = num(p.saturation_pct, 0);   // 0-100 percent
var brightness = num(p.brightness_pct, 0);   // 0-100 percent

// Route each value to its own output
return [
    { payload: powerOn },
    { payload: hue },
    { payload: saturation },
    { payload: brightness }
];
Set the function node to 4 outputs and wire each output to its dashboard widget. Gauges suit hue_deg, saturation_pct, brightness_pct, kelvin, position_pct, the channels, temperature_c, and humidity_pct; text displays suit power_on (ON/OFF) and occupancy (PRESENT/CLEAR).
FlowFuse Dashboard 2.0 note: Theformatfield does not evaluate JavaScript expressions. Convert booleans and numbers to display strings in the function node first, then reference{{msg.payload}}.
Part 5: Controlling Devices
Publish to v1/gateway/command/json. The gateway translates each JSON payload into the corresponding BLE mesh frame. Use QoS 0 and no retain.
Command: power
Supported by all controllable device types (value: true = on, false = off).
{
  "device_type": 1,
  "device_id": 1,
  "command": "power",
  "value": true
}
Command: color
HSV lights only (device_type: 1). Sets hue, saturation, and brightness in one command.
{
  "device_type": 1,
  "device_id": 1,
  "command": "color",
  "hue": 180,
  "saturation": 100,
  "brightness": 55
}
Command: brightness
Adjusts brightness without changing colour. Supported for HSV (1), HCL (3), and Dimmer (4) — hue and saturation stay unchanged.
{
  "device_type": 1,
  "device_id": 1,
  "command": "brightness",
  "value": 75
}
Sending commands from Node-RED
A function node sets msg.topic = 'v1/gateway/command/json' and builds the msg.payload object, wired to an mqtt out node (leave the topic blank on the out node).
msg.topic   = 'v1/gateway/command/json';
msg.payload = {
    device_type: 1,
    device_id:   1,
    command: 'power',
    value:   msg.payload   // boolean from switch widget
};
return msg;
For three HSV sliders, merge their values via flow context before publishing — each slider fires independently and would otherwise overwrite the others.
// Wire all three sliders to this single function node
// Set each slider's msg.topic to: 'hue' | 'saturation' | 'brightness'

var ctrl = flow.get('hsvCtrl') || { hue: 0, sat: 100, bri: 55 };

if      (msg.topic === 'hue')        ctrl.hue = Number(msg.payload);
else if (msg.topic === 'saturation') ctrl.sat = Number(msg.payload);
else if (msg.topic === 'brightness') ctrl.bri = Number(msg.payload);

flow.set('hsvCtrl', ctrl);

msg.topic   = 'v1/gateway/command/json';
msg.payload = {
    device_type: 1,
    device_id:   1,
    command:     'color',
    hue:         ctrl.hue,
    saturation:  ctrl.sat,
    brightness:  ctrl.bri
};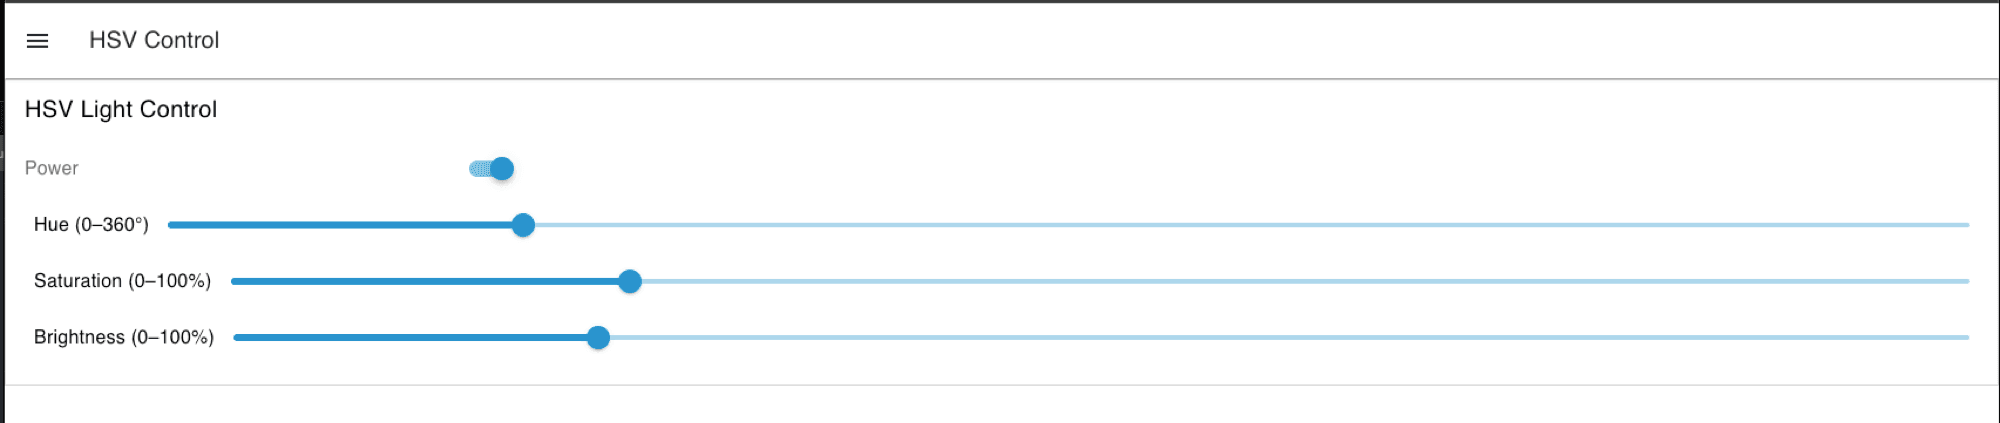
return msg;| Slider | msg.topic | Min | Max | Output trigger |
|---|---|---|---|---|
| Hue | hue | 0 | 360 | On release |
| Saturation | saturation | 0 | 100 | On release |
| Brightness | brightness | 0 | 100 | On release |
Note: Set each slider's trigger to "on release" so you don't flood the broker while the user is dragging.
Frequently Asked Questions
I see no telemetry after setting up the gateway. What's wrong?
First confirm Mosquitto is running and listening on 0.0.0.0, not just 127.0.0.1. Then subscribe to # to see all broker traffic, and make sure the gateway actually finished provisioning in the MESHLE app.
The Node-RED MQTT node shows "disconnected".
In Docker, set the broker hostname to host.docker.internal, not 127.0.0.1; when running natively, use 127.0.0.1. Confirm port 1883 matches in both the broker config node and your Mosquitto config.
Power shows true/false instead of ON/OFF.
FlowFuse Dashboard 2.0 does not evaluate JavaScript in the widget format field. Convert the boolean to a string in the function node first, then display {{msg.payload}}.
My commands publish but the device doesn't respond.
Make sure device_type and device_id match exactly what the telemetry shows. The color command is only valid for device_type 1 — use brightness for HCL (3) and Dimmer (4) — and confirm the device is active on the mesh.
HSV or sensor fields are missing or showing 0.
Those fields only appear for the matching device_type. Check the device_type in the debug panel and read only the fields documented for that type.
Planning a local MQTT or BMS integration around MESHLE lighting? Talk to us about your project — we support developers, integrators, and OEMs through the design-in.
Further Reading
- MESHLE Gateway: one mesh, open APIs (REST, MQTT, Modbus, BACnet™)
- Control MESHLE devices from a WAGO PLC via BACnet™ (CODESYS guide)
- Why MESHLE smart lighting works offline-first
- What is Bluetooth Mesh? A plain-language introduction
- Talk to MESHLE about your local MQTT or BMS integration
BACnet™ is a trademark of ASHRAE.